
No products
Product successfully added to your shopping cart
There are 0 items in your cart. There is 1 item in your cart.


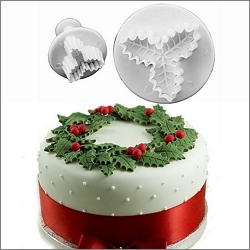


These origami Christmas wreaths are so easy to make yet so sturdy and so very pretty!
Use them to decorate cards or make them into tree decorations by simply adding a cord hanging loop.
For this one print:-
One of the wreath sheets onto good quality white 120gsm white paper/card (Print Perfect 120 is just right for this).
A matching background sheet onto medium weight white card/paper such as Print Perfect 160.
To make the card:-
Stick one of the backgrounds onto a square card with double-sided tape. If you want to add a metallic card border, cut out one of the backgrounds without the border, stick the piece to metallic card and trim round with a craft knife and ruler before sticking it to the other background with the border.
To make the wreath:-
1. Cut the 4 squares from the sheet into 8 strips using the guidelines provided (4 pictured).

2. Take one of the strips and fold it lengthways.

3. With the opening at the top, fold down both corners so that they touch the bottom edge. Crease well.

4. Fold the piece neatly in the middle and crease well.

5. Fold all 8 strips in the same way, then start assembling the wreath.

6. Position the shapes as shown, then push the points of one into the little 'pockets' on the bottom of the next one.

7. Repeat with the other pieces.......

8. ...... until the wreath is complete.

To complete the card, use the wreath as it is or wind gold elasticated cord around it to make it really Christmassy.
Stick to the card with double-sided tape and add a greeting if required.
Products used on the Origami Christmas Wreath
 £14.99
