
No products
Product successfully added to your shopping cart
There are 0 items in your cart. There is 1 item in your cart.
-
-

We also have download sets featuring up to 40 A4 sheets, with most sets having projects using the sheets.Download Sets
-


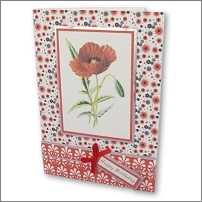
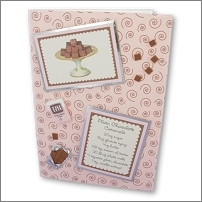


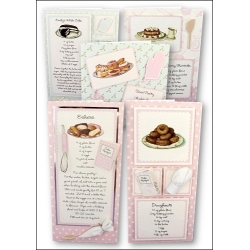
Great little piping bag mini on this card as well as a great salt dough 'piped' eclair.
For this one print:-
The Eclair recipe cards quality white card
The pink polka dot background paper onto quality white paper
The Kitchen Minis 3 sheet onto quality white paper
The Template sheet onto thin white card (around 160gsm)
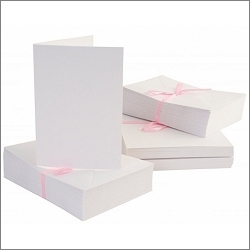
Cover the front of an ivory DL (tall) card blank with the pink polka dot background paper. If you don't have an ivory card blank, we've included a plain ivory sheet in the set so you can print your own (onto white card).
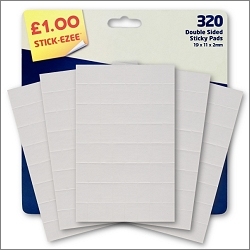
Cut out (with a pink border) an eclair recipe card and mount it to a larger piece of silver metallic card with double-sided tape before trimming round with your craft knife and ruler to leave a small border. Stick it to the card so there's around 3cm space at the bottom to add the piping bag.
For the little recipe book, cut out a cover and around 4-5 of the mini recipes with a craft knife and ruler. Add 3mm tape to the left hand side of each page and make a little stack of pages, finishing by adding the stack to the recipe book cover and folding it over. If you don't have 3mm tape, cut a strip to this size from 6mm or 12mm tape. Stick it to the card with further double-sided tape.
For the whisk, cut out one of the long pink strips from the Kitchen Minis 3 sheet - this is the whisk handle. Starting by winding the paper round a cocktail stick, roll up the paper - it doesn't matter if it skews as you roll it as you can tap it on your desk when you've finished to neaten the roll. You don't need to tape it at the start but stick down the end with a piece of double-sided tape that's at least 3cm long (to make sure it doesn't come unstuck).
By starting the paper 'bead' with a cocktail stick, you should have a nice sized hole in the middle into which you poke the wire to make the whisk. Cut 2 pieces of silver-coloured 20 gauge craft wire to around 8cm long each. Bend the wire over your finger and flatten out around 1cm at each end - these ends will be poked into the handle. Don't squeeze the ends together too much as the springiness will hold the wire in the handle. Bend another smaller piece of wire for the hanging loop.
Not essential but if you want the wire to feel really secure, ease a little strong tacky glue down the hole with a cocktail stick before pushing in the wire. Leave the whisk to dry before sticking it to the card blank (joint in the paper-side down) with strong tacky glue on the handle part only.
To make the piping bag you'll need some white polycotton-type fabric. I used one of my son's old school shirts for the fabric (love a bit of recycling!) but you could also use an old sheet or pillowcase for this. If you have nothing old to cut up at all, try going to a Pound Shop and buying a pack of men's white hankies to use instead.
Use the half-circle template from the template sheet - pin it on to the fabric and cut around, or draw around it and cut out the shape afterwards. Make sure that no pen/pencil marks show on the cut out piece.
Fold the corners of semi-circle together, then fold in the cut side to cover a third of the piece and finally fold over the other side, bringing the bag to a nice point. Use a little cotton wool or wadding to stuff it slightly. Squash up the open end fasten it with a little piece of silver beading wire. Stick it to the card with strong tacky glue.
And finally - the 'piped' eclair dough is made with just a little bit of salt dough which is incredibly easy to make. There are lots of variations on salt dough that can be found if you Google it but this one was made with just 2 teaspoons of plain flour a teaspoon of fine salt. Mix in enough water to make a soft dough - there will be enough to make lots of little 'eclairs' and whatever else you fancy!
This little piece is vaguely carrot-shaped and is 17mm long - squash it down a little to make a nice flat back to stick it with. I made quite a few and picked the one that I liked best. I baked these in the oven for just 10 minutes at 100C but you can also just leave them to air-dry (although they'll take a lot longer to dry out).
I didn't do it with this one but as the cake mixture would be shiny, you could varnish the finished salt dough piece with a glaze or just with a coating of PVA glue.
When cool/dry, stick it to the card blank with strong tacky glue.
See all of our recipe card projects on![]()
Products used on the Eclairs Recipe card
 £2.75
£2.75
